Midtown Manhattan 36 W 44th St Ste 1416 New York, NY 10036

Yoga Exercises

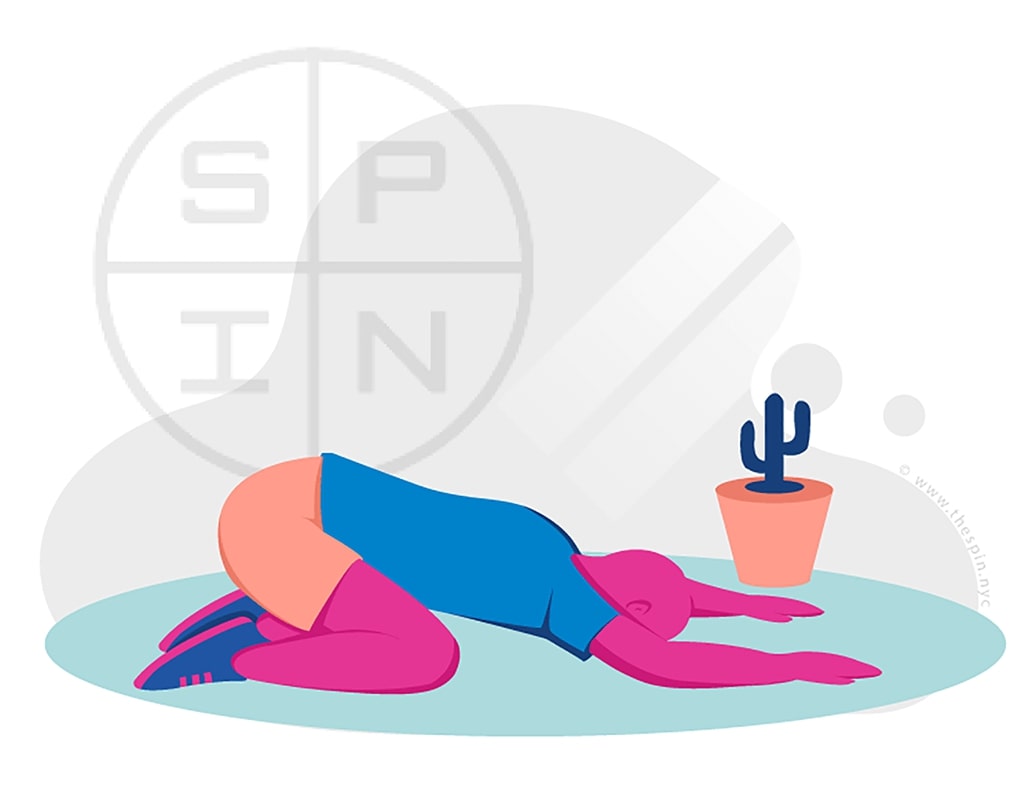
Child’s Pose

Yoga Childs Pose Exercise
  1. Kneel on the floor.
  2. Sit comfortably on your heels, hug your big toes together, and then spread your knees about hip-width apart.
  3. Exhale and bend your torso forward to lay it down against your thighs.
  4. Inhale and bring your forehead to the floor.
  5. You can extend your arms back on the mat alongside your body with palms up and near your hips. Or you can stretch your arms forward above each side of your head with your arms and palms resting on the floor.
  6. Release your shoulders toward the floor. Bring awareness to how the weight of your shoulders draws your shoulder blades away from each other.
  7. Keep breathing as you press your belly against your thighs on each inhale.
  8. Hold this resting pose for 8 to 12 breaths.
  9. To exit the pose, bring your palms, walk your palms until they are under your shoulders. Inhale and slowly lift to a seated position as in the beginning (with your knees on the floor and heels under your hips).

Locust Pose

Yoga Locust Pose Exercise
  1. Lie on your belly with your legs stretched behind you on the mat.
  2. Bring your arms back on the mat by the sides of your body and your hands with palms up near your hips.
  3. Rest your forehead on the mat.
  4. With your head still resting on the floor and your neck relaxed, try to reach forward through your head and backward via your toes. Press your pubic bone into the mat. The goal is to lengthen your back and activate your back muscles, forming a stable support.
  5. Inhale and lift your head, upper chest, arms, and legs off the mat. Keep your arms parallel to the floor and your legs close together.
  6. Be mindful of preventing any injury to your neck by gazing ahead or slightly down instead of looking up towards the ceiling.
  7. Hold the pose for several breaths.
  8. Finally release the pose by slowly lowering your head, arms, and legs to the floor.
  9. Keep lying down on the mat and rest for a while with your head turned to one side as you continue to take deep breaths.

Sphinx Pose

Yoga Sphinx Pose Exercise
  1. Lie on your belly with your legs stretched behind you on the exercise mat.
  2. .Rest your elbows and hands on the mat separated about shoulder-width apart with elbows a bit in front of your shoulders (more towards the outer edge of the mat), and fingers pointing straight towards the outer edge of the mat.
  3. Take a deep breath and move your torso and head away from the floor to give some bend to your back. Keep your hips firm but do not squeeze them. All movements should be subtle.
  4. While in this pose, think about lengthening the space between your pubis and belly button, as well as lengthening your lower back. Become aware of your lower belly, your pubic bone and your belly button.
  5. Stay in this pose for 5 to 10 deep breaths. Be mindful of preventing any injury to your neck by gazing ahead or slightly down instead of looking up towards the ceiling.
  6. At your last exhale, slowly lower yourself to the mat. Turn your head to one side and rest your head on your forearm. Lie calmly for a while, expanding your back with each inhale, and take the edge off any stress with each exhale.

Bridge Pose

Yoga Bridge Pose Exercise
  1. Lie on your back on the floor with your knees bent and feet flat on the mat about hip-width apart.
  2. If needed, slide in a rolled-up blanket beneath your shoulders to protect your neck.
  3. Walk your heels up towards your sit bones. To gauge the correct position of your heels, bring your hands down toward your feet on the floor. If your heels still seem farther from your sit bones, draw them close to the point where your fingertips land on the mat.
  4. Tuck your chin in.
  5. Exhale and relax your neck.
  6. Inhale. Root your feet into the floor and become aware of all the four edges of your feet. Turn upper.
  7. Exhale and slowly scoop your tailbone up as you press your palms into the floor.
  8. Keep scooping up from the backs of your thighs rather than from your lower back as you continue to take deep breaths.
  9. Stop when your back is up off the mat and your thighs are parallel to the floor. At the peak of your bridge pose, your knees will be directly over your heels. Walk your knees forward away from your sit bones to lengthen the space between your tailbone and the back of your knees.
  10. Stay in the pose for 30 seconds to 1 minute while continuing to take deep breaths.
  11. Slowly roll down your spine to the mat, starting from your upper back, one vertebra (backbone) at a time. Your tailbone should be the last part to touch the floor.
  12. Rest for a while on the floor.

Wall Dog Pose

Yoga Wall Dog Pose Exercise
  1. Stand facing a wall.
  2. Bend from your hips.
  3. Extend and place your palms on the wall at any point between your shoulder and elbow height.
  4. Keeping your hands on the wall with your arms parallel to the floor, walk your feet back from the wall until your hips are just above your feet. (If you find that your hamstrings/the backs of your thighs are really tight at this position, bend your knees a bit and walk your hands up to your shoulder height. However, if you’re flexible, you would want to go for the elbow height).
  5. Stop when your arms and spine make one long line, parallel to the floor.
  6. Actively press the palms of your hands into the wall while drawing your shoulder blades down your back.
  7. Dynamically lengthen your spine to create space between each of your vertebra (backbone).
  8. Let your head come down a bit between your arms while you gaze down and take a few deep breaths.
  9. Raise your head and look at your fingers, and slowly walk your hands up the wall.

Triangle At Wall Pose

Yoga Triangle at Wall Pose Exercise
  1. Stand with your left side facing the wall.
  2. Place your left hand on the wall to your shoulder height.
  3. Spread your legs wide apart, about 4 to 5 feet, usually according to your height.
  4. Rotate your left leg towards the wall so your toes point towards the wall.
  5. Turn your right foot slightly in toward your left foot so that the right foot is a bit oblique.
  6. With your left hand still on the wall, bend at your left hip toward the wall and walk your left hand up the wall. Your head, left shoulder, and your left foot should be in line with each other. Your head and torso should shift slightly towards the wall while your right hip must shift towards your right.
  7. As you exhale, extend your right arm above the right shoulder like you’re trying to reach the ceiling with your palm, and slowly gaze up at the right hand.

Standing Forward Bend at Wall Pose

Yoga Standing Forward Bend at Wall Pose Exercise
  1. Start with a wall dog pose.
  2. Step your right leg forward toward the wall.
  3. Step your left leg back (about 3 feet) away from the wall with your left foot slightly turned out.
  4. Keeping both legs straight and your hands on the wall, slowly lower your back to make it parallel to the floor as possible.

Cobra Pose

Yoga Cobra Exercise
  1. Lie on your belly with your legs stretched behind you on the mat slightly wider than hip-distance apart.
  2. Place the top parts of your feet on the floor and press them into the floor.
  3. Squeeze your shoulder blades together and back. (No need to crunch your shoulders).
  4. Tuck your pelvis in, draw your navel towards your spine, and press your pubic bone firmly into the floor.
  5. Spread your hands on the floor under your shoulders, so your palms come to rest on the mat directly under your armpits, with fingers facing forward.
  6. Hug your elbows at the side of your body.
  7. Inhale, press palms down into the floor and using your back muscles, slowly lift the crown of your head, then neck, and then chest, gazing forward. Be sure not to cause any strain on your lower back.
  8. Hold the pose for several breaths.
  9. Exhale, and slowly release your upper back, neck, and head down to return to the starting position.

Chair Pose

Yoga Chair Pose Exercise
  1. Stand with your feet close together.
  2. Take a deep breath in. Exhale and drop your chin towards your chest and gaze down towards your feet.
  3. Lift and spread your toes and the balls of your feet, then release your toes down to the floor. Rock your toes back and forth and from side to side.
  4. Make some room between your heels while keeping the front part of your foot where it is.
  5. Take a deep breath, and on an exhale, bend your knees, stick out your hips, and sway your lower back as if you’re going to sit in an imaginary chair.
  6. Place your hands over your waistline.
  7. Lengthen your lower back by drawing your tailbone down toward the floor as you lift your chest and draw your belly in.
  8. Inhale and extend your arms overhead up towards the ceiling with your palms facing each other. Keep your arms away from your shoulders. Be mindful of your lower rib cage drawing in, toes spread, and sit bones hanging over your heels.
  9. Sink your knees a little deeper while keeping your arms raised up towards the sky.
  10. Stay in this pose for 5 to 10 breaths.
  11. Exhale and step your legs back along with your hips to shift weight back on heels.
  12. Finally, inhale as you straighten your legs while pressing your feet on the floor and release your arms down to return to the starting position.

Chair Twist Pose Seated

Yoga Chair Twist Pose Seated Exercise
  1. Sit sideways on an armless chair, facing the back of your chair.
  2. Plant both feet steadily on the floor separated about hips-width apart.
  3. Take a deep breath, raise your arms, and twist your upper body to your left. Remember to keep your spine nice and tall and your shoulders in line as you inhale.
  4. Exhale, bring your arms down, holding onto the back of the chair.
  5. Release hands and rest them on your thighs as you turn back to your side where you started.
  6. Turn to your right by move your legs around to the right side of the chair and repeat the same steps.

Baby Dancer Pose

Yoga Baby Dancer Pose Exercise
  1. Beginning in a standing position with the left side of your body facing the wall and your left hand spread on the wall.
  2. Come back to the standing position while gazing at a point in front of you, slowly shift your weight to your left leg.
  3. Keep your left leg straight and steady on the ground.
  4. Take a deep breath and flex your right leg at your knee so your right foot is behind you.
  5. Grab your right foot close to your ankle with your right hand.
  6. Keeping your knees aligned with your hips, take some time to steady yourself.
  7. Inhale, and raise your left hand (that is still on the wall) up over your head.
  8. Hold this pose for a couple of breaths.
  9. Gently release your bent leg and return your hands to your sides.
  10. Come back to starting position.
  11. Repeat on your opposite side.

Downward Facing Dog Pose

Yoga Downward Dog Pose1 Exercise
  1. Begin on all fours with your hands directly under your shoulders and your knees directly under your hips.
  2. Walk your hands for a few inches in front and root your palms into the mat with your fingers evenly spread apart, especially the area between your thumbs and index fingers on both sides.
  3. Raise your hips with your pelvis rocking up towards the ceiling and lower your forehead so it touches the mat. Your spine must be elongated, and your shoulders relaxed.
  4. While staying in this pose, take a couple of deep breaths.
  5. Now, you’ll transition from this pose to the actual downward dog pose by lifting your head up gently, slowly walking your knees a bit forward, and curling your toes.
  6. Lift one elbow then another elbow, then one knee followed by another knee.
  7. Then smoothly lift your hips while you keep looking down towards the mat.
  8. Straighten your legs as you press your heels into the floor.
  9. Stretch out your arms while keeping your palms rooted to the floor with a downward pushing action.
  10. Gently relax your hand and neck and pedal your feet while taking deep breaths.
  11. Get your belly and heart melting towards the thigh.
  12. Stay in this downward dog pose for several breaths.
  13. Finally, exit the pose by deeply inhaling then exhaling. Then, slowly come down to all fours and walk your palms back under your shoulders and your knees under your hips to exhibit a tabletop position.
  14. If you are a beginner, you may want to further relax your body by melting your body into a child pose.
Schedule appointment


    RECEIVE CONFIRMATION VIA:


    Sports Injury & Pain Management Clinic of New York 36 W 44th St Ste 1416 New York, NY 10036
    (Between 5th & 6th Ave)
    (212) 621-7746 sportspainmanagementnyc.com Patient Resources: Accessibility | Privacy Policy | Terms of Service | HIPAA | Sitemap
    © 2024
    Sports Injury & Pain Management Clinic of New York City
    New York's best rated pain management center.
    Website & SEO by NYMM
    DMCA.com Protection Status